Editor guide
Commit, branch and push
Desde writes straight to your files. How to undo, commit a checkpoint, work on a branch, publish it, and push it to GitHub.
Desde changes your project's real files the moment you make a change. This page covers what happens next: how to undo something, how to commit a checkpoint you can name, how to work on a branch of your own, and how to publish or push it so your team gets it.
There is no Save button#
When you retype a label, drag a row, or accept a change from chat, it is already written to disk. There is nothing to save, and nothing to lose by closing the tab.
This also means an unwanted change is already there too. The rest of this page is about getting back to where you were.
Three ways to go back#
Desde gives you three different ways to undo, and they cover different amounts of work. They do not stack, so pick the right one for what you are trying to undo.
| Way | Where | Undoes |
|---|---|---|
| Undo | The floating toolbar | Your last change made in this session |
| Undo on a row | The Activity panel, on each edit | That one edit, even after you have closed and reopened Desde |
| Backup journal | .desde/backups/ inside the prototype |
The bytes any single write replaced. Restoring is manual: copy the file back yourself. |
| Your own git | Your own git tools | Anything, as far back as you have committed |
The toolbar's Undo steps backward through your edits one at a time, up to 50 of them. It forgets everything once you quit Desde.
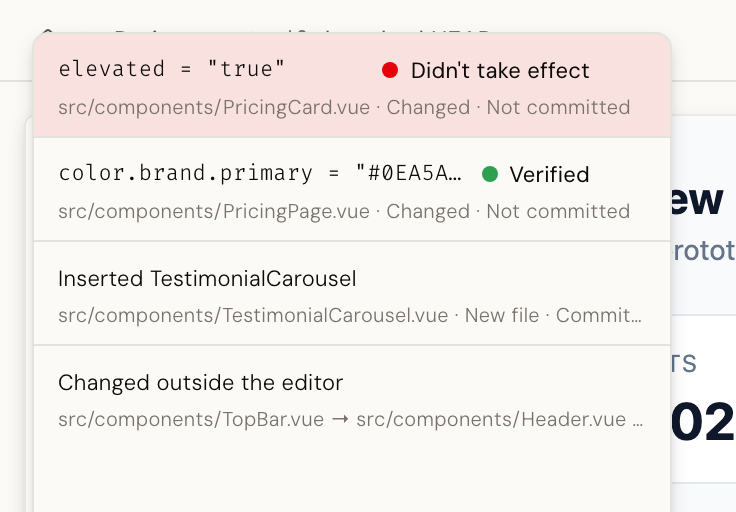
The Activity panel, in the right rail, lists every edit Desde has made. Each row has its own Undo, and it survives quitting and reopening Desde. It is only offered when Desde can prove the file has not changed since, so you never undo into the wrong version of a file.
Before every change, Desde also copies the file into .desde/backups/ inside the
prototype. There is no button for this. If you ever need it, find the previous version of
the file there and copy it back yourself.
Once you commit, the safest way back is your own git: the history you built with Commit, below.
Commit: save a checkpoint you can name#
A commit is a labeled checkpoint in your project's history. You can always come back to it later, from Desde or from your own git tools.
The Commit button sits in the top bar, with a count of your changed files next to it. It is grayed out when there is nothing new to commit.
Click it and a dialog opens for a short message describing what you changed. Leave it blank and Desde fills in a default.
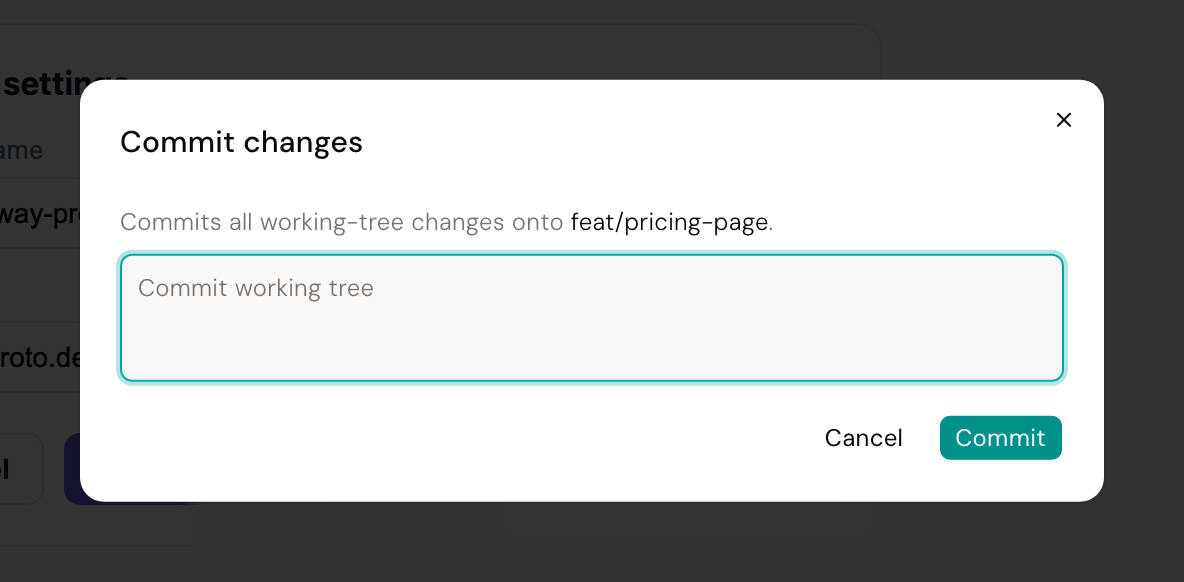
Commit records everything changed in your project, not only the parts Desde touched. If you also edited a file by hand in your own code editor, that change is committed too.
Commit skips your repository's pre-commit hooks. If your project relies on them, for formatting or linting, run them yourself before you push.
You can commit as often as you like. It costs nothing, and it is the only thing here that survives closing Desde for good.
Branches: switch, create, rename, publish#
A branch is a separate line of work. You can make changes on it without touching the version everyone else sees, which is usually called the default branch.
Start new work on its own branch rather than on the default one. That way, an idea that does not work out never has to be undone: you just leave the branch behind.
The Branch menu, in the top bar, lists your branches and lets you:
- Switch to any branch in the list.
- Create a new branch to start fresh work, or duplicate the one you are on.
- Rename the branch you are on.
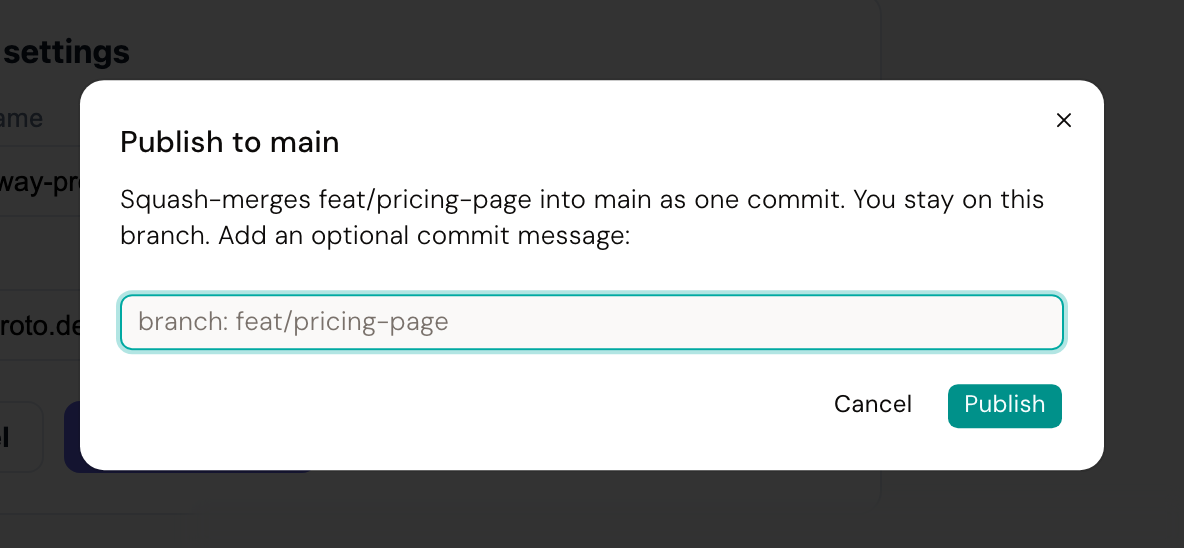
- Publish your branch, once you are ready. This option is hidden while you are already on the default branch.
Switching or creating a branch asks you to commit first if you have uncommitted changes. This is on purpose: git would otherwise carry those changes onto the new branch, mixing up work that belongs on two different branches.
Renaming is the one exception. You can rename the branch you are on even with changes still uncommitted.
There is no delete in the menu. To delete a branch, use your own git tools; Desde picks up the change the next time you open the menu.
Switching or creating a branch clears the toolbar's Undo history, because it changes which files are on disk. Your Activity panel and your git history are unaffected.
Publish: make your branch the real version#
Publishing folds your branch into the default branch, as one entry in its history. It is how your work becomes the version everyone else sees.
If you still have uncommitted changes on the branch you are publishing, Desde commits them first, so nothing is left behind.
Use Publish when your work is ready and you want it to become the shared version straight away, without asking anyone to review it first. If you want a review first, use Open pull request instead, covered next.
Send it further: the Merge / Push menu#
A dropdown next to Commit holds a few more ways to send your branch somewhere. Each option grays itself out with the reason when it cannot run right now, for example when your project has no GitHub connection, or there is nothing new to send.
-
Push branch commits anything pending, then sends your branch to GitHub, without merging it into anything. Use this to back up your work or hand it to a teammate.
-
Pull remote changes brings in anything newer on GitHub for your branch.
-
Update from
<default>, where<default>is your default branch's name, brings in whatever your teammates have published since you started. Use it before you publish, so your branch already has their latest work. -
Merge & push to
<default>does what Publish does, and also sends the result to GitHub in the same step. -
Open pull request creates a pull request: a request, sent through GitHub, asking a teammate to look at your branch before it joins the shared version. It is disabled while you are on the default branch, or if your project has no GitHub connection set up.
You stay on your own branch after any of these. Only Publish, and the two options above that mention it, move the default branch forward.
When something conflicts#
A conflict happens when you try to bring two versions of the same lines together. This can happen when you publish, or when you pull in a teammate's changes, and git cannot tell which version should win.
When that happens, Desde stops and shows you a dialog naming the files that conflicted. Nothing is left half-done: your branch keeps exactly the content it had a moment before.
Desde does not resolve a conflict for you. Bring the default branch's latest changes into yours using Update from <default>, fix the conflicting lines with your own git tools, commit, and then publish or push again.
You may also see "Nothing to publish". That is not a conflict: it means your branch's content is already part of the default branch, so there is nothing left to fold in.
Habits that make this comfortable#
- Start new work on its own branch, not on the default branch.
- Commit early and often. It costs nothing, and it is the only thing here that survives closing Desde.
- Commit before you switch branches. Desde will ask you to anyway.
- If you also have a code editor open on the same project, expect files to change under you sometimes. Reload the file rather than saving over what Desde just wrote.
Next#
- Making changes: what actually gets written when you edit
- Ask the AI: describe a change instead of clicking through it
- When Desde says no: what Desde will not do, and what to try instead